*Not all subscriptions have access to this feature - please check with your account admin.
Bookings lets you share a personal scheduling link so others can book one-on-one meetings with you — without the back-and-forth emails. When someone books a time, the system automatically creates a video conferencing link and adds the meeting to both calendars.
This guide walks through connecting a calendar, creating a booking page, setting your availability, sharing your link, and managing booked meetings.
Before you start
Bookings is found in the top navigation bar. It has three tabs:
- My Calendars – connect and sync the calendar(s) you want Bookings to check for conflicts and add events to.
- Booking Pages – create and manage your scheduling links.
- Booked Events – view meetings guests have booked with you.
Step 1: Connect your calendar
Before creating a booking page, connect at least one calendar so the system knows when you're free and can add confirmed meetings automatically.
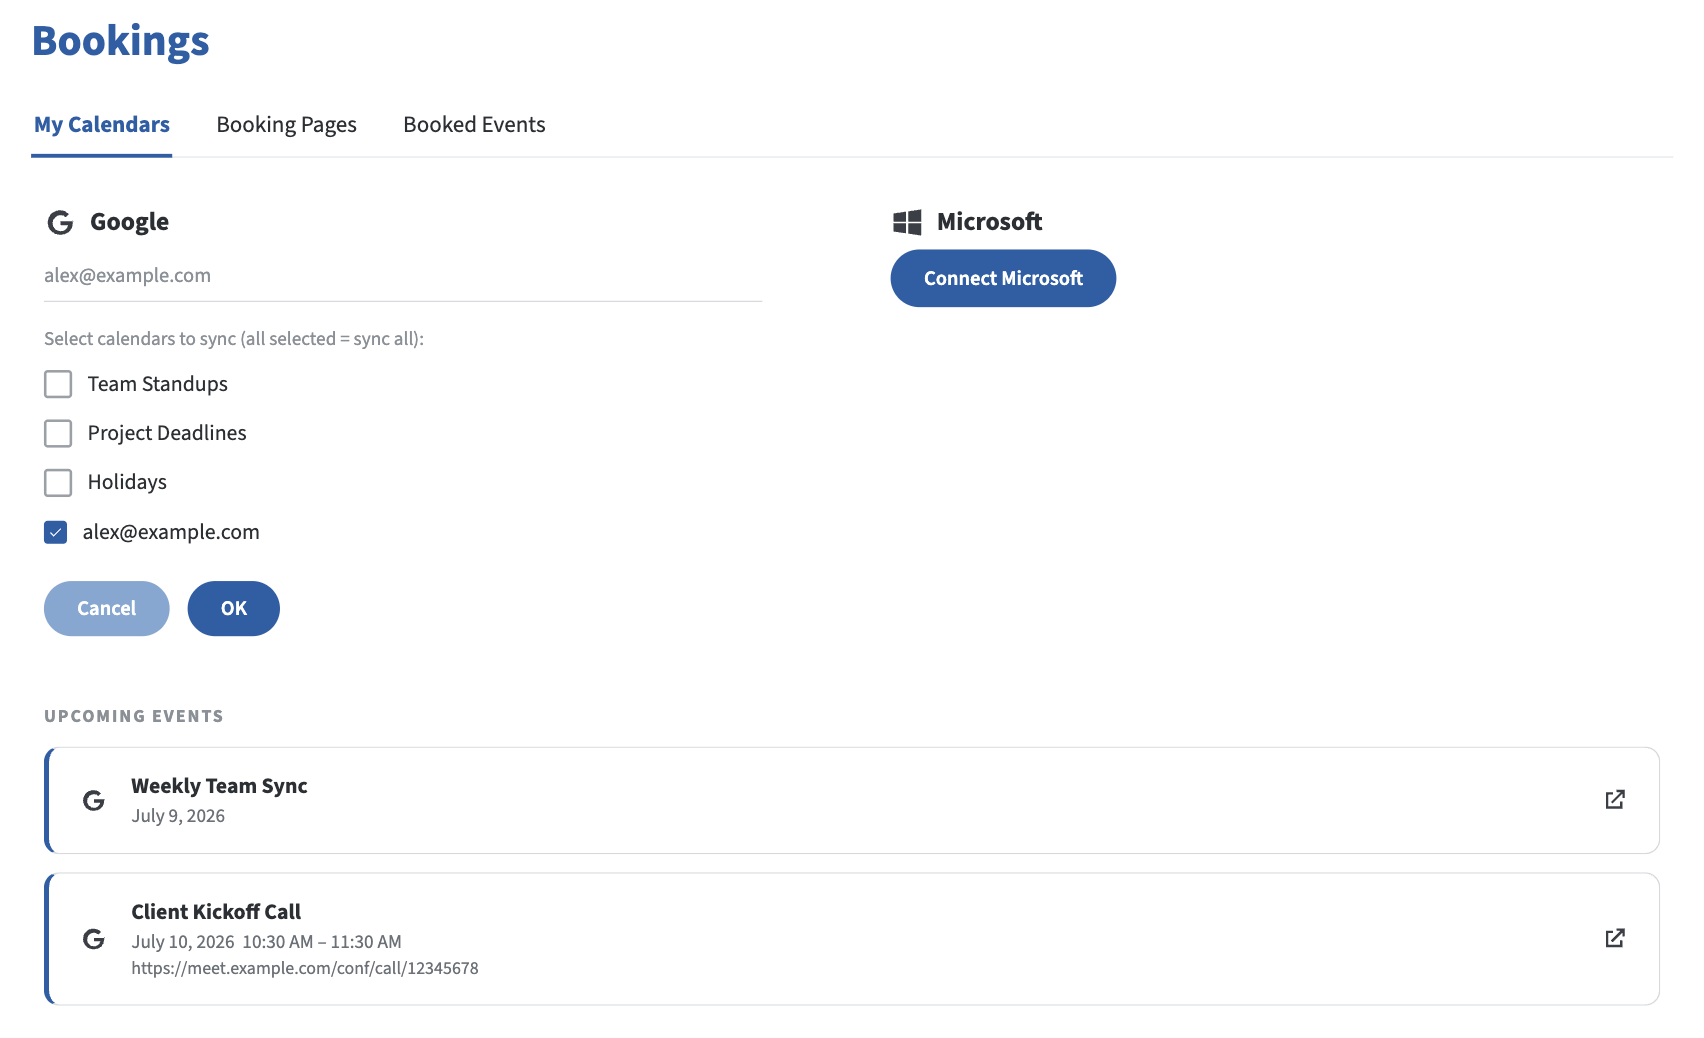
- Go to Bookings > My Calendars.
- Click Connect under Google or Microsoft, and sign in to grant access.
- Once connected, click Choose calendars to sync if you want to select specific calendars (useful if you have more than one).
- Your upcoming events will appear under Upcoming Events once the calendar is connected.
You can connect both a Google and a Microsoft calendar. To stop syncing a calendar, click Disconnect.
Step 2: Create a booking page
A booking page is the link you'll share with guests. You can create more than one — for example, a 30-minute intro call and a 60-minute consultation.
- Go to Bookings > Booking Pages.
- Click Create Booking Page.
- On the Detailstab, fill in:
- Name – what guests will see (e.g., "30-Minute Consultation").
- Description – optional details about the meeting, with basic formatting available.
- Duration (minutes) – how long each meeting lasts.
- Buffer time between appointments (minutes) – a gap added after each booking so you have time to prepare for the next one.
- Slot interval (minutes) – how frequently available times are shown (e.g., every 30 minutes vs. every hour).
- Default Calendar – which connected calendar the booked event will be added to.
- Location – how the meeting will be held (e.g., Meeting Link).
- Active – check this box to allow guests to book this page; uncheck it to take the page offline without deleting it.
- Max consecutive slots guests may book – set to 1 to allow only single-slot bookings, or raise it to let a guest book multiple consecutive slots in one request.
- Click Save, or continue to the Availability tab before saving.
Step 3: Set your availability
Availability determines which days and hours guests can book.
- In the booking page editor, open the Availability tab.
- Check the days of the week you're available (unchecked days show as Unavailable).
- For each active day, set a start and end time (e.g., 9:00–17:00).
- Click + Add time range if you want to split a day into multiple windows (e.g., 9:00–12:00 and 13:00–17:00, to block out lunch).
- Click Save.
All times are shown in your account's timezone.
Step 4: Share your booking page
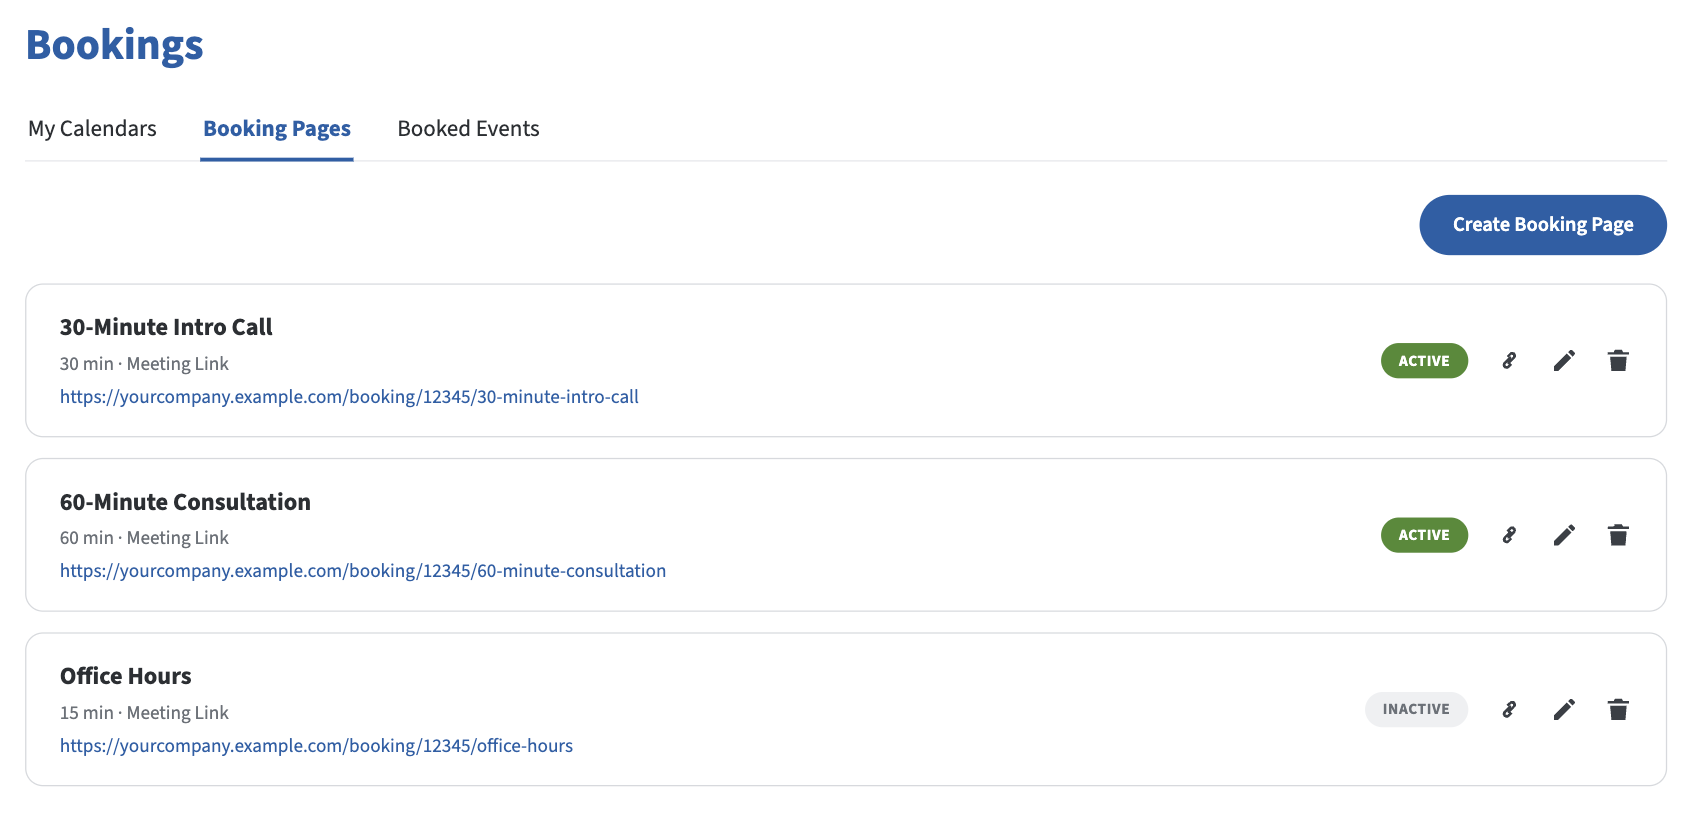
Once saved, your booking page appears in the Booking Pages list with:
- Its name, duration, and meeting link type
- An ACTIVE/inactive status
- Icons to copy the link, edit, or delete the page
Click the link icon to copy the booking URL, and share it with guests by email, chat, or on your website. When a guest opens the link, they select an open time, enter their name and email, and receive a confirmation along with a calendar invite containing the video conferencing link.
Step 5: Manage booked events
To see meetings guests have scheduled:
- Go to Bookings > Booked Events.
- Toggle between Upcoming and Past to view meetings.
Each booked meeting is also added automatically to your default calendar for that booking page, with a video conferencing link included.
Editing or removing a booking page
From Booking Pages, click the pencil icon to edit a page's details or availability at any time, or the trash icon to delete it. Deleting a page removes it from your list and disables its link for new bookings.
If you just want to temporarily stop accepting bookings on a page without deleting it, click the pencil icon and uncheck Active on the Details tab, then save. Re-check it any time to make the page bookable again.
Good to know
- Meeting type: Bookings currently supports one-on-one meetings only.
- Guest info collected: Name and email address are required from every guest.
- Video links: A video conferencing link is generated automatically for every booked meeting — you don't need to create one manually.
- Timezone: Availability and booked times display in your account's timezone.
Troubleshooting
Guests can't see any available times. Check that at least one day is enabled on the Availability tab and that a calendar is connected under My Calendars — Bookings needs a connected calendar to check for conflicts.
A booked meeting didn't appear on my calendar. Confirm the correct calendar is selected as the Default Calendar on that booking page, and that the calendar connection under My Calendars is still active (not disconnected).
I don't want a page to accept new bookings. Edit the page and uncheck Active on the Details tab — this takes the page offline without deleting it, so you can turn it back on later.
Was this article helpful?
That’s Great!
Thank you for your feedback
Sorry! We couldn't be helpful
Thank you for your feedback
Feedback sent
We appreciate your effort and will try to fix the article